Mastering Live Streaming with StreamYard: A Comprehensive Guide for 2026

Thinking about live streaming or maybe even recording a podcast? It can seem like a big hurdle, all those technical bits and pieces. But what if I told you there's a way to make it much simpler? This guide is all about StreamYard, a tool that really takes the pain out of going live. We'll walk through how to get started, make your streams look good, keep your audience tuned in, and even use it for bigger events. Plus, we'll cover what to do after your stream and how to avoid common problems. Let's get your stream yard sorted.
Key Takeaways
- Setting up your stream yard account is quick, and the interface is easy to figure out, even if you're new to this.
- You can make your streams look professional by adding your own logo, colors, and even intro videos using stream yard's branding tools.
- Keeping your audience involved is simple with features like highlighting comments and using on-screen banners for important messages.
- Stream yard lets you broadcast to multiple platforms at once, which is a huge time saver for reaching more people.
- Before you go live, always do a quick private test to check your audio, video, and any on-screen elements to avoid surprises.
Getting Started with StreamYard
So, you're ready to jump into live streaming and heard StreamYard is the way to go? Good choice. It's designed to be pretty straightforward, even if you're not a tech wizard. Think of it as your virtual studio, all accessible right from your web browser. No complicated software downloads or installations needed for you or your guests. This means you can focus more on what you're saying and less on fiddling with settings.
Account Setup and Interface
First things first, you need an account. Signing up is simple; you can use your email or a Google account. StreamYard uses a six-digit code for login, so no need to remember another password. Once you're in, you'll see your dashboard. This is your main hub where you can see past recordings, manage connected streaming platforms, and set up new broadcasts. It's pretty clean and easy to figure out. You'll find options to start a broadcast right away, schedule one for later, or just record without going live.
The dashboard is your command center. It lists your recordings, connected destinations, and team members if you’re sharing an account. It’s where you’ll spend most of your time when you’re not in the studio itself.
Guest Invitations and Participation
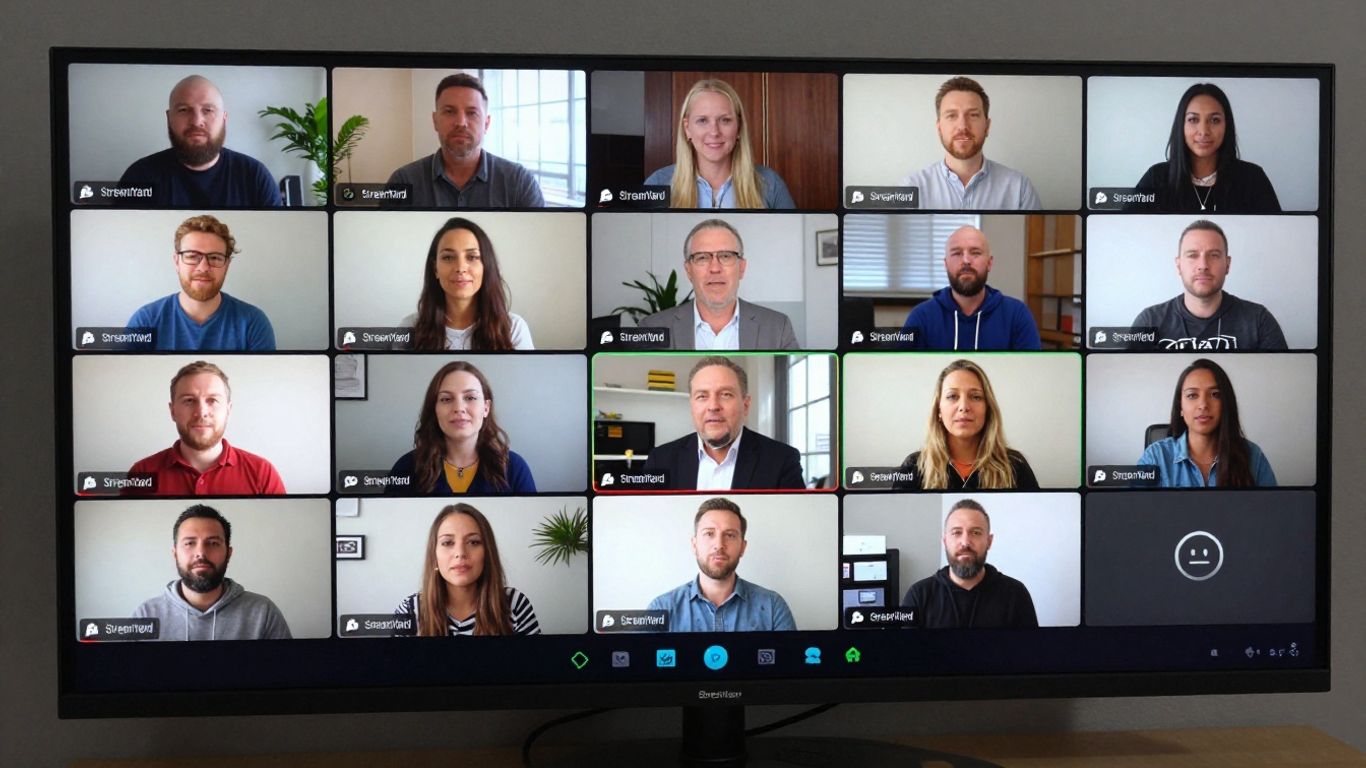
Bringing guests onto your show is one of StreamYard's best features. You just create a unique link and send it to your guest. They click the link, choose their camera and microphone, and they're in the 'backstage' area, ready to join the broadcast when you are. They don't need to install anything, which is a huge plus, especially if you're working with people who aren't super tech-savvy. You can have quite a few people on screen at once, depending on your plan.
Here’s a quick rundown of how guest invites work:
- Generate a unique guest link from your StreamYard dashboard.
- Send this link to your guest via email, chat, or any messaging app.
- Your guest clicks the link, selects their audio and video devices, and enters the waiting room.
- You then bring them onto the 'stage' from your studio controls.
Connecting Your Streaming Destinations
Before you can go live, you need to tell StreamYard where you want your stream to appear. This is where you connect your social media accounts or other platforms. You can link up to eight destinations on paid plans, including popular spots like YouTube, Facebook (profiles, pages, and groups), Twitch, and LinkedIn. You can even stream to custom RTMP endpoints if you have your own website or platform. Connecting a platform usually involves a simple authorization process where you grant StreamYard permission to stream to your account. Once connected, these destinations will be ready to go when you hit 'Go Live'. This multistreaming capability is a big reason why people choose StreamYard, as it helps you reach a wider audience without extra effort. You can find a step-by-step tutorial for StreamYard setup to help you get started.
| Platform | Connection Type | Max Destinations (Paid) |
|---|---|---|
| YouTube | Channel | 8 |
| Profile/Page/Group | 8 | |
| Twitch | Channel | 8 |
| Profile/Event | 8 | |
| Custom RTMP | Endpoint | 8 |
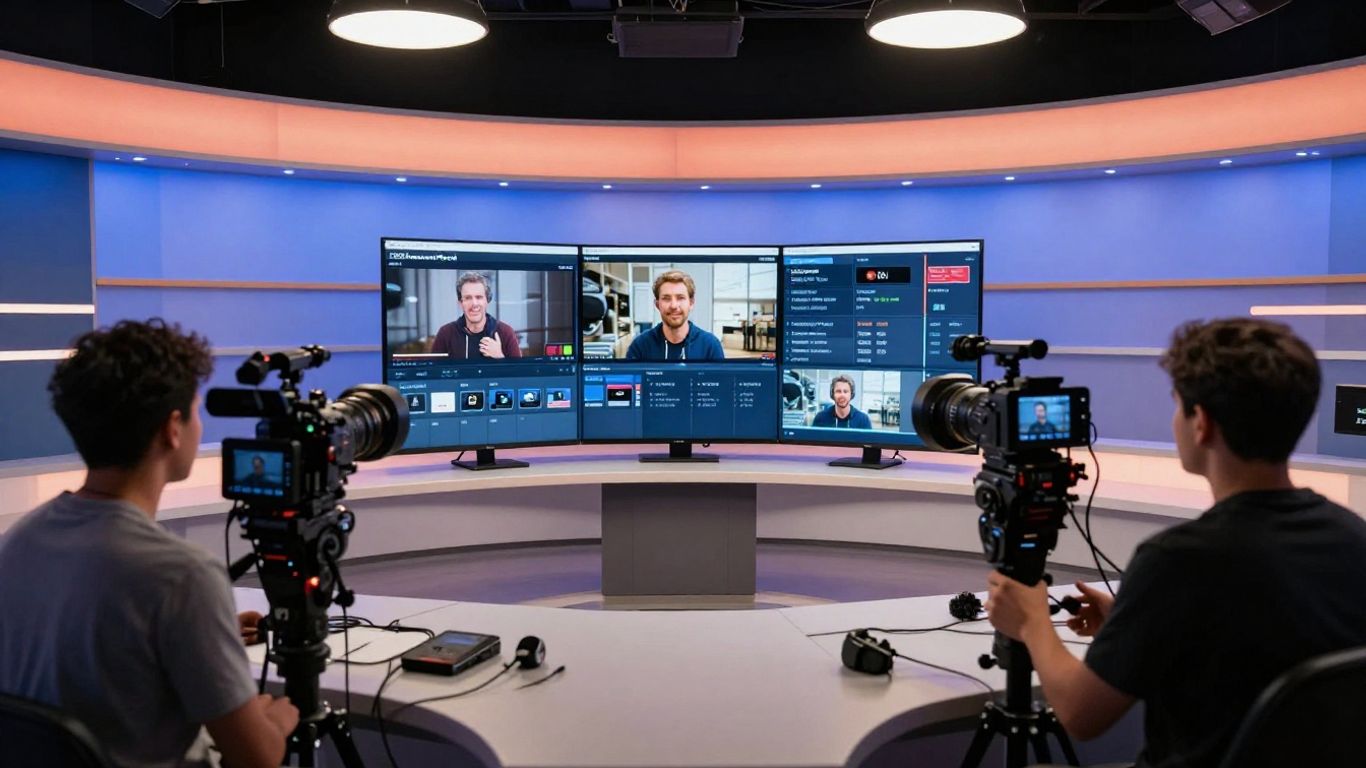
Mastering Your StreamYard Studio
Once you've got the basics down, it's time to really make your StreamYard studio work for you. This is where the magic happens, turning a simple broadcast into a polished, professional show. Think of the studio as your virtual control room; it's where you arrange everything your audience sees and hears.
Optimizing Audio and Video Quality
Let's be real, nobody wants to watch a stream that sounds like it's coming from the bottom of a well or looks like it was filmed on a potato. Good audio and video are non-negotiable. StreamYard makes it pretty straightforward, but there are a few things you can do to really nail it.
- Microphone: Use a dedicated microphone if you can. Even a decent USB mic is a huge step up from your laptop's built-in one. Make sure it's positioned correctly – usually a few inches from your mouth.
- Camera: Position your camera at eye level. Looking down at your audience or up at you is just weird. A tidy background also helps a lot; nobody needs to see your laundry pile.
- Lighting: Natural light is your friend. Sit facing a window if possible. If not, a simple ring light can make a world of difference.
- Headphones: Always wear headphones to prevent echo. StreamYard has echo cancellation, but it works best when you're not feeding your own mic back into your speakers.
The goal here is to make your viewers feel like they're in the room with you, not like they're tuning into a fuzzy radio signal from across the country.
Customizing Your Brand Identity
This is where you make the stream yours. StreamYard lets you add your own flair so your broadcast looks consistent with your other online presences. It’s not just about looking good; it's about building recognition.
- Logo: Upload your logo. It usually sits in a corner, a constant reminder of who's broadcasting.
- Colors: Set your brand colors. This applies to things like banners and text overlays, keeping everything cohesive.
- Banners: Use banners to display titles, guest names, or key messages. They can be static or scrolling.
- Overlays: These are graphics that can appear on screen, like lower thirds with names and titles.
Leveraging Layouts and On-Screen Elements
How you arrange people and content on screen matters. StreamYard offers several layouts, and knowing when to use each one can keep your viewers engaged. You can switch these up on the fly, which is pretty neat.
Here are some common layouts and when to use them:
| Layout Type | Description | Best For |
|---|---|---|
| Single Presenter | One person takes up the full screen. | Solo commentary, presentations, or intros. |
| Two People Split | Two participants side-by-side. | Interviews, co-hosted segments. |
| Three People Grid | Three participants in a grid format. | Panel discussions, group chats. |
| Full Screen Guest | Your feed is small, guest is full screen. | When a guest is the main focus. |
| Picture-in-Picture | Your feed is large, guest is a smaller overlay. | When you need to show something on your screen. |
Don't forget about other on-screen elements like calls to action. You can add these as banners or even use the ticker to scroll important links. It's all about guiding your audience and making it easy for them to take the next step, whether that's visiting your website or subscribing. If you're looking for a straightforward way to manage your streams, StreamYard is a solid option.
Enhancing Audience Engagement
Keeping your viewers interested during a live stream is key. It's not just about talking; it's about making them feel like they're part of the show. StreamYard gives you a few neat tools to make this happen without too much fuss.
Utilizing Comment Highlights
This is a big one. When people comment, they want to be seen, right? StreamYard pulls comments from all your connected platforms into one spot. You can then pick out interesting questions or shout-outs and put them right on your screen. It makes viewers feel heard and encourages more people to jump in. It’s like giving a virtual high-five to your audience.
- Monitor the unified comment feed: Keep an eye on all incoming messages.
- Select comments to display: Choose what you want your audience to see.
- Respond in real-time: Directly address viewer input during the stream.
Showing comments on screen is a simple yet effective way to build a connection. It turns passive viewers into active participants.
Implementing Banners and Calls to Action
Banners are like little signs you can put up during your stream. You can use them to show your website address, announce upcoming events, or just remind people to subscribe. They're great for sharing information that needs to stay visible for a bit. Think of them as digital billboards for your stream.
- Announce upcoming streams: Let viewers know when your next show is.
- Share links: Direct people to your social media or website.
- Display key messages: Highlight important points or promotions.
Running Polls and Q&A Sessions
For webinars or more structured streams, polls are super useful. You can ask your audience what they think about a topic, or what they'd like to see next. It’s a quick way to get feedback and make your audience feel involved in shaping the content. Q&A sessions, especially during webinars, let you tackle specific questions head-on, making the stream more informative for everyone. You can find out more about audience engagement tools that can help make your streams more interactive.
Advanced StreamYard Features
The Multistreaming Advantage
StreamYard really shines when you need to be everywhere at once. Forget the hassle of going live separately on YouTube, Facebook, and Twitch. With StreamYard, you can push your broadcast to up to eight different platforms simultaneously on paid plans. This means your message reaches a much wider audience without you having to do extra work. Even the free plan lets you stream to one destination, which is pretty handy.
Connecting your streaming destinations is straightforward. You just add them in your settings, authorize StreamYard, and they're ready to go. This feature is a lifesaver for social media managers trying to maximize reach. Plus, StreamYard pulls all your comments into one unified feed, so you can actually keep up with what people are saying across all platforms. It's a big time-saver.
Recording and Local File Preservation
One of the coolest things about StreamYard is how it handles recordings. It doesn't just record the stream; it actually records each participant's audio and video locally on their own device. What does this mean for you? Well, even if someone's internet connection is a bit shaky during the live show, their individual recording will still be high quality. This is a huge deal for podcasts or interviews where audio and video clarity are super important. You can get separate audio tracks for each person, making editing later a breeze. Paid plans offer local recordings, with storage increasing based on your subscription level.
The local recording feature is a game-changer for maintaining broadcast quality, especially when dealing with remote guests. It acts as a safety net against unpredictable internet issues, ensuring you get the best possible footage and sound from every participant.
Hosting On-Air Webinars
StreamYard isn't just for social media streams; it also has a built-in webinar platform called StreamYard On-Air. This is great if you do training sessions, workshops, or product demos. You can set up registration pages, send out email reminders to attendees, and even have a private chat just for them. The best part? You can embed the webinar player right onto your own website, so it looks like it's all part of your brand. Depending on your plan, these webinars can host anywhere from 250 up to 10,000 viewers, making it suitable for small classes or large online events. This integrated approach means you don't need to juggle multiple tools for your online events, simplifying your workflow significantly. If you're looking for a way to host interactive online events without a lot of technical fuss, StreamYard's webinar feature is definitely worth checking out for your streaming needs.
Post-Broadcast Strategies
So, you've wrapped up your live stream. Awesome! But don't just close the tab and forget about it. What happens next is just as important, if not more so, for getting the most out of your effort. Think of it as the "after-party" for your content.
Repurposing Content for Social Media
Your live stream is a goldmine of content, and you don't want to leave any of it buried. The goal here is to take what you just created and chop it up into smaller, bite-sized pieces that work well on different platforms. This means turning those hour-long discussions into short, punchy clips for TikTok, Instagram Reels, or YouTube Shorts. Focus on the highlights – a great quote, a funny moment, or a key takeaway. StreamYard has a handy tool that lets you trim clips and create these short videos easily. You can even make them square or vertical, which is perfect for mobile viewing. This way, people who missed the live show can still catch the best bits, and it gives your content a longer shelf life.
Downloading and Editing Recordings
After your stream ends, you'll want to grab the recording. StreamYard lets you download both the video and audio files. This is super useful if you want to do more with it later. Maybe you want to edit out any mistakes, add some extra graphics, or even turn it into a podcast. The audio file is great for that – just pop it into your favorite audio editor. For the video, you can use editing software to clean it up, add intro or outro music, or combine it with other footage. It’s all about making sure you have a high-quality version of your content that you can use however you see fit. You can also use these recordings to share your StreamYard broadcasts with your email list to boost viewership for future events.
Analyzing Stream Performance
Finally, let's talk about looking at the numbers. After you've finished your broadcast and maybe done some repurposing, it's time to see how you did. Check your analytics. How many people watched live? How many views did the recording get later? What was the audience retention like? Did people engage with the comments or polls? Understanding these metrics helps you figure out what worked and what didn't. This information is gold for planning your next stream. You can see which topics got the most attention or which formats kept people watching longer. It's a cycle: stream, repurpose, analyze, and then improve for the next time.
Don't just look at the raw numbers; try to understand the story they're telling. Were there specific moments where viewership dropped? Did a particular guest bring in a lot of new viewers? Digging into the details will help you make smarter decisions for future broadcasts.
Here's a quick look at what you might want to track:
- Total Viewers: How many unique people tuned in.
- Peak Concurrent Viewers: The highest number of people watching at the same time.
- Total Watch Time: The cumulative time viewers spent watching.
- Engagement Rate: Likes, comments, shares relative to viewership.
- Click-Through Rate (if applicable): For any links or calls to action used.
Troubleshooting and Best Practices
Even with the best setup, things can go sideways when you're live. It's not always a smooth ride, and sometimes you'll hit a snag. But don't sweat it! A little preparation and knowing what to do can save your stream from disaster. The most important thing is a stable internet connection. Everything else kind of falls into place after that.
Ensuring Stable Internet Connectivity
This is non-negotiable. If your internet is shaky, your stream will be too. Think of it like trying to talk on the phone with a bad signal – choppy and frustrating for everyone. Here's how to keep things solid:
- Go wired: Whenever possible, use an Ethernet cable instead of Wi-Fi. It's just more reliable. Wi-Fi can be great, but it's more prone to interference and drops.
- Check your speed: Make sure your upload speed is sufficient for the quality you're aiming for. StreamYard is pretty good at handling different speeds, but you don't want to push it too hard. A quick speed test can tell you a lot.
- Limit other users: If other people in your house are streaming, gaming, or downloading huge files while you're live, it's going to eat up your bandwidth. Ask them to hold off if you can.
Minimizing Stream Latency
Latency, or delay, is pretty much a given in live streaming. There's always a gap between when something happens on your end and when your viewers see it. It's just how the technology works. For most streams, a few seconds isn't a big deal, but it's good to be aware of it.
- Expect it: Understand that there will be a delay. This is especially important for Q&A sessions. If you ask a question, give it a good 10-15 seconds before you expect an answer to start rolling in.
- Platform matters: Different streaming platforms have different levels of latency. YouTube might be a bit slower than Twitch, for example. It's not something you can control directly within StreamYard, but it's good to know.
- Keep it simple: While StreamYard has tons of cool features, sometimes using fewer complex overlays or effects can slightly reduce the processing needed, which might help with latency, though internet speed is the bigger factor.
Testing Your Stream Privately
This is a lifesaver. Before you go live to the world, do a test run. It’s like rehearsing a play before opening night. You wouldn't want your first time trying a new layout or inviting a guest to be during your actual broadcast, right?
- Private Broadcast: StreamYard lets you set your stream to private. This means only you (and anyone you share the link with) can see it. It's perfect for checking audio, video, and how everything looks.
- Guest Rehearsal: If you have guests coming on, invite them to a private test stream. This lets them get comfortable with the interface and helps you iron out any technical kinks they might have on their end. You can even practice inviting guests this way.
- Check Everything: During your private test, check your microphone levels, camera angles, any graphics you're using, and how the audio sounds. Make sure your internet connection holds up for the duration of the test.
Sometimes, the simplest solution is the best. Don't overcomplicate your setup if you don't need to. Focus on clear audio and video, and your audience will appreciate it more than fancy, glitchy effects.
Wrapping It Up
So, we've gone through a lot in this guide about StreamYard. It really does make going live or recording a podcast much simpler, especially when you have guests joining from different places. You don't need to be a tech wizard to get a professional-looking stream out there. Just remember to plan your content, check your audio and video before you hit 'go live', and use those branding tools to make your show look good. StreamYard handles a lot of the tricky stuff so you can focus on what you're saying. Give it a try, play around with the free version, and see if it fits what you're trying to do. Happy streaming!
Frequently Asked Questions
Can I use StreamYard just for audio, like a podcast, without video?
Absolutely! StreamYard has a 'Record Only' mode. This lets you capture just the audio and video locally for each person. After you finish recording, you can download the separate audio files and use them in your favorite podcast editing software. It makes editing much easier!
Does StreamYard work if I want to stream from my phone or tablet?
You and your guests can join streams using mobile web browsers like Chrome or Safari on your phones or tablets. However, some of the fancier features, like sharing your screen or adding lots of branding, work best on a computer. For the best experience when hosting, using a desktop or laptop is recommended.
How many people can join my stream as guests?
On the free plan, you can have up to six people on screen with you at the same time. The paid plans let you have more, with some plans allowing many more people to be 'backstage' – ready to join the show when you need them.
Is there a way to practice my stream before going live to real viewers?
Yes, definitely! You can set up your stream as 'private' or 'unlisted'. This lets you and your team do a full run-through, check your audio and video, and make sure everything looks good before you invite your audience. It's a great way to catch any problems early.
What happens if my internet connection is not very good during a stream?
StreamYard is smart about this! It records each person's audio and video directly on their own device. This means that even if your internet connection gets a bit shaky during the live show, the recording itself will still be high quality. You won't lose your content due to a bad connection.
Can I stream my broadcast to multiple social media sites at the same time?
Yes, that's one of StreamYard's best features! You can connect your stream to go live on platforms like Facebook, YouTube, Twitch, and more, all at the same time. This helps you reach a bigger audience without having to stream separately on each site.